Point light shadows in Three.js

Of course objects in your garden cast shadows and influence the look and feel of the lighting: we needed to include shadow casting in our demos. That seemed doable, but it turned out the WebGL framework we use for our WebGL development, Three.js, only supports shadow casting for spot lights. Unfortunately not all lights in our gardens are spot lights... We needed to find a way to cast shadows from point lights in Three.js.
 Screen from the garden prototype. Spot light support only...
The first step was understanding how shadow casting works for spot lights and understanding why this would not work for point lights. The process of shadow casting is quite elegant. It takes an extra render pass one comparison per object and light to determine if a fragment should be shaded.
The extra render pass is rendering the distance of an object to every light to a separate texture. This is called the depth pass. You can do this by applying the inverse View matrix, which represents the position and rotation of the camera, to the current object and applying the model matrix of the current light you want to calculate shadows for.

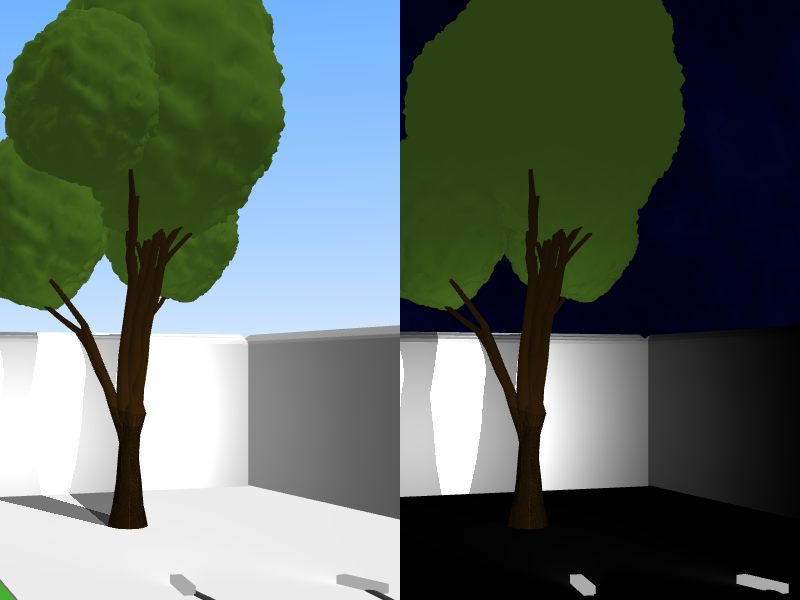
The above picture shows a color representation of the depth value. Each color corresponds with a 32 bit integer indicating where its z-position lies between Z-Near and Z-Far. So a the maximum value of the 32 bit integer would correspond with Z-Far and the 0 value would correspond with Z-Near.
Now you can check for every pixel if it is in the shade of a certain light as follows.
Take the world coordinate of the fragment you are processing right now. This information can be passed by the vertex shader and interpolated in the fragment shader. Transform it into light space: mimic looking at that spot from the position of that light. This is achieved by passing the transformation matrix of the light you are processing to the fragment shader. Then transform it to a pixel coordinate by applying the perspective transformation of the corresponding "shadow camera". This determines what area is shaded by this light. The next step is to calculate the distance between the point and the light, if this is greater than the distance stored in the depth pass texture (z-buffer texture) the pixel is shaded by this lamp, if it's closer it is illuminated.
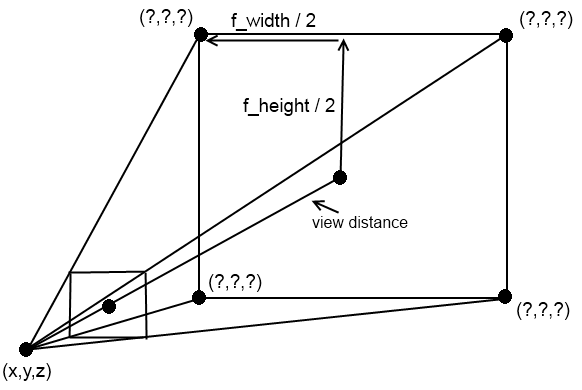
But this only works well for spot lights because of the how perspective works in OpenGL. Perspective mapping in OpenGL works with frustums, which is a pyramid with the top cut off. The new plane that is created by removing the top of the pyramid is called the near plane and this is what you see on screen. All other pixels are coloured by ray tracing to the far plane from the eye through the pixel you want to color to the far plane (which is the bottom of the pyramid). This works for small angles, but the maximum angle you can approach is 180 degrees. At which your near plane will be very small and very close to the camera position, which will cause weird distortions in the rendering. For point lights we would need a 360 degree field of view as it is called, and this is simply impossible.

So what do we do? Instead of doing 1 depth pass we do 6. One for every unit direction of the space we are in. so one in +x, -x, +y, -y, +z and -z direction. All with a horizontal and vertical field of view of 90 degrees. This covers the whole space. But where do we render them to? We can't use 1 texture for all of them, as they would simply override the previous depth pass. There are four solutions:
Render them to 6 different textures. Which takes up 6 of the (in our case) 16 texture samplers available to us in the webgl fragment shader pipeline.
Render them to one big texture with smaller viewports. Lowers the maximum possible shadow resolution and complicates shaders as you need to map shadow camera matrices to the right parts of the texture.
Use a cube map which is a 3D texture that has 6 2D textures corresponding to each side of a cube creating a shadow cube. Only uses one sampler but has the same shader complexity of mapping a shadow perspective to the right cube side.
Use dual paraboloid shadow mapping, which does allow us to use 1 texture for point lights but still needs the 6 render passes we talked about. Another downside of this technique is that there are slight distortions, but all in all it should look nice enough.
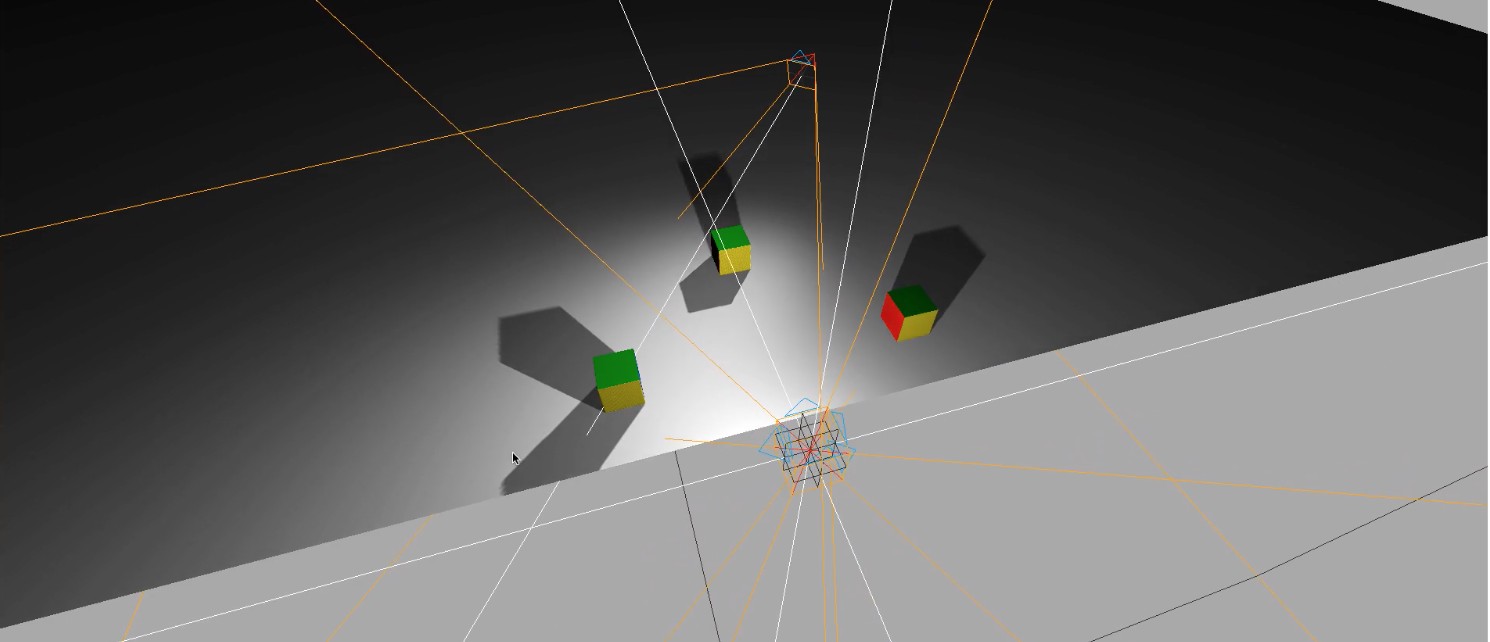
These implementations are all candidate implementations for the final prototype. They haven’t been implemented yet except for the first one, which makes 6 seperate textures per point light. The result of that implementation is shown below.
Update: we've written a follow-up article "Point light shadows in Three.js, part II".
Test environment for point light shadows