React and Three.js
Currently, there are two libaries that provide React bindings for Three.js. This post will explore their differences using working examples. We hope it will help you to make up your mind which one to choose.
React
React has become a popular choice for creating user interfaces. React keeps a virtual DOM and changes in the UI are applied to this virtual DOM first. Then React calculates the minimal set of changes that are needed to update the real DOM to match with the virtual DOM. This process is called reconciliation. Because DOM operations are expensive, the performance benefit of React is substantial.
But there is more to React than the performance impact. Especially in combination with Flux, JSX and the debug tools for the browser it is a very powerful and yet easy to use library to create complex UI's with reusable components.
Where React ultimately creates html that is rendered by the browser, there is an increasing number of libraries that provide React bindings for libraries that render to the canvas element such as D3.js, Flipboard and Chart.js. There are also bindings for SVG and another interesting experiment is gl-react.
React and Three.js
For Three.js there are two libraries that provide React bindings:
Three.js keeps a virtual 3D scene in memory which is rendered to the WebGL context of the canvas element every time you call the render method. The render method completely clears the canvas and creates the complete scene anew, even when nothing has changed.
Therefor we have nothing to gain performance-wise when using React with Three.js, but there is still plenty reason to use it. React encourages you to create components and move state out of components as much as possible, resulting in cleaner, better to maintain code, and the JSX notation gives you a very clear overview of the hierarchical structure of the components in your 3D scene as we will see in the code examples in the next chapter.
Two libraries compared
React-three is written in es5, react-three-renderer is newer and written in es6. The following code examples, that both create a simple cube, show us the differences between the libraries. First react-three:
  import React3 from 'react-three';

  let Scene = React3.Scene
  let Camera = React3.Camera;
  let AmbientLight = React3.AmbientLight;
  let Mesh = React3.Mesh;

  <Scene
    width={window.innerWidth}
    height={window.innerHeight}
  >
    <Camera
      aspect={window.innerWidth / window.innerHeight}
      far={1000}
      fov={50}
      near={1}
    />
    <AmbientLight
      color={this.props.color}
      intensity={this.props.intensity}
    />
    <Mesh
      position={this.props.position}
      geometry={new THREE.BoxGeometry(this.props.size, this.props.size, this.props.size)}
      material={new THREE.MeshBasicMaterial({color: this.props.color})}
    />
  />
And now the same in react-three-renderer:
  import Scene from 'react-three-renderer'

  <Scene
    width={window.innerWidth}
    height={window.innerHeight}
  >
    <perspectiveCamera
      aspect={window.innerWidth / window.innerHeight}
      far={1000}
      fov={50}
      near={1}
    />
    <ambientLight
      color={this.props.color}
    />
    <mesh
      position={this.props.position}
      <boxGeometry
        width={this.props.size}
        height={this.props.size}
        depth={this.props.size}
      />
      </meshBasicMaterial
        color={this.props.color}
      />
    />
  />
We see two obvious differences:
1) In react-three we import one object and this object contains all available components. I have given the components the same name as the properties of the imported object, but I could have used any name. The naming convention in React commands us to write custom components starting with an uppercase, which I obied willingly.
In react-three-renderer we import one component and the available components are known within this component/tag. This is because react-three-renderer uses internal components, similar to div, span and so on. Note that the names of the components start with lowercases.
2) In react-three the properties geometry and material of the Mesh component are instances of the corresponding Three.js classes whereas in react-three-renderer both the geometry and the material are components as well.
React-three has only 17 components, but react-three-renderer strives to create components for every (relevant) Three.js class, thus gaining a higher granularity.
Creating components
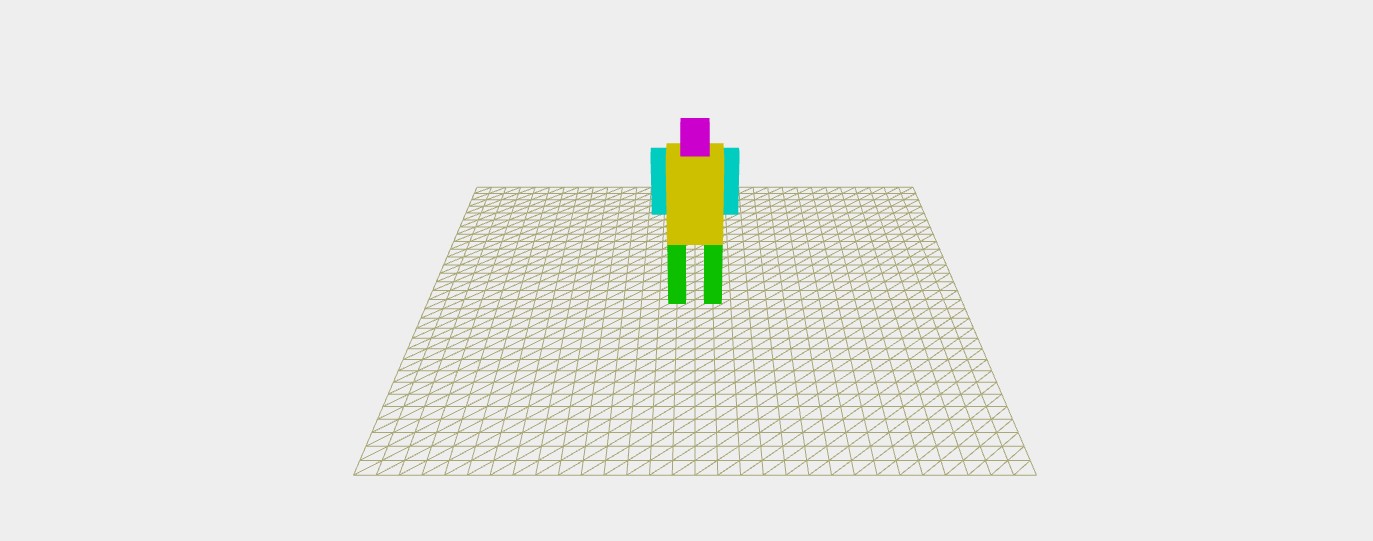
The following example is a Minecraft character configurator that we can use to change the sizes of all the cubes that the character consists of.
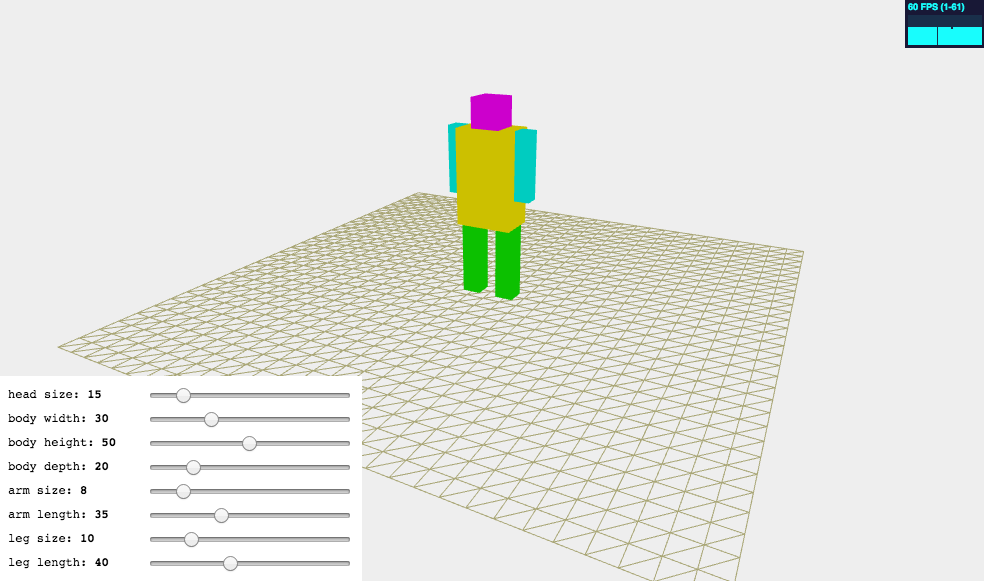 Screenshot of the Minecraft character configurator
It shows you how easy it is to create 3D components with both libraries and how your code benefits from using React both in terms of being well-organised and maintainable.
All code is available at github and you can find the live examples here.
The code of the main component looks as follows:
  <Controls
    headSize={this.state.headSize}
    bodyWidth={this.state.bodyWidth}
    bodyHeight={this.state.bodyHeight}
    bodyDepth={this.state.bodyDepth}
    armLength={this.state.armLength}
    armSize={this.state.armSize}
    legLength={this.state.legLength}
    legSize={this.state.legSize}
  />
  <Scene3D
    sliderBusy={this.state.sliderBusy}
    cameraPosition={this.state.cameraPosition}
    cameraQuaternion={this.state.cameraQuaternion}
  >
    <World
      position={new THREE.Vector3(0, 0, 0)}
      worldRotation={this.state.worldRotation}
    >
      <Minecraft
        key={THREE.Math.generateUUID()}
        position={new THREE.Vector3(0, 0, 0)}
        quaternion={new THREE.Quaternion()}
        scale={new THREE.Vector3(1, 1, 1)}
        config={this.state.config}
      />
    </World>
  </Scene3D>
First we create a section that contains all controls, then we create the scenegraph containing a plane (World) on which the Minecraft character gets placed. As you can see all code specific to the Minecraft character is tucked away in its own component, leaving the hierarchal structure very clear despite its complexity.
When we take a look at the code of the Minecraft character component we see how much complexity is actually abstracted away:
  <group
    key={'character'}
    position={this.props.position}
    quaternion={this.props.quaternion}
    scale={this.props.scale}
  >
    <Box
      key={'head'}
      size={config.head.size}
      color={config.head.color}
      position={config.head.position}
    />
    <Box
      key={'body'}
      size={config.body.size}
      color={config.body.color}
      position={config.body.position}
    />
    <Box
      key={'leftLeg'}
      size={config.leftLeg.size}
      color={config.leftLeg.color}
      position={config.leftLeg.position}
    />
    <Box
      key={'rightLeg'}
      size={config.rightLeg.size}
      color={config.rightLeg.color}
      position={config.rightLeg.position}
    />
    <Box
      key={'leftArm'}
      size={config.leftArm.size}
      color={config.leftArm.color}
      position={config.leftArm.position}
    />
    <Box
      key={'rightArm'}
      size={config.rightArm.size}
      color={config.rightArm.color}
      position={config.rightArm.position}
    />
  </group>
Here we see a component named Box which is some wrapper code around a cube. By using this component we not only reduce the amount of code in the Minecraft character module, we also abstract away differences between the 2 libraries.
This means that we can use the Minecraft character component both in projects that use react-three and in projects that use react-three-renderer.
To see the different implementations of the Box component please take a look at the code on github: react-three and react-three-renderer.
Importing models
The model loaders for Three.js load the various 3D formats (Collada, FBX, Obj, JSON, and so on) and parse them into Three.js objects that can be added to the scene right away. This is very convenient when you use Three.js without React bindings, but it requires an extra conversion step when we do use React bindings because we need to parse the Three.js object into components.
I have written some utility code for this which is available at github. You can find two working examples of how to use this code with both libraries in a separate repository at github.
The utility is a parser and a loader in one and this is how you use it:
  let parsedModel = new ParsedModel();
  parsedModel.load('path/to/model.json');
After the model is loaded it is parsed right-away. During the parsing step a map containing all geometries is generated. All these geometries are merged into one single large geometry as well and for this merged geometry a multi-material is created.
Now we can use it in a React component, in react-three like so:
  <Mesh
    geometry={parsedModel.mergedGeometry}
    material={parsedModel.multiMaterial}
  />
In react-three-renderer we need more code, on the one hand because multi-materials are not (yet) supported so we can not use the merged geometry, and on the other hand because of its higher granularity:
  let meshes = [];

  parsedModel.geometries.forEach((geometry, uuid) => {
    // get the right material for this geometry using the material index
    let material = parsedModel.materialArray[materialIndices.get(uuid)];

    meshes.push(
      <mesh
        key={uuid}
      >
        <geometry
          vertices={geometry.vertices}
          faces={geometry.faces}
        />
        {createMaterial(material)}
      </mesh>
    );
  })

  <group>
    {meshes}
  </group>
The createMaterial method parses a Three.js material into a react-three-renderer component, see this code at github.
Pros and cons
Using React-bindings for Three.js results in very clean code. Usually you don't have a hierarchical overview of your 3D scene, but with React your scene is clearly laid out in a tree of components. As as bonus, you can debug your scene with the React browser tools.
As we have seen in the Minecraft character configurator, using React is very efficient for applications that use composite components, and we have seen how smoothly React GUI controls can be connected to a 3D scene.
In applications with a flat structure, for instance when you have a lot of 3D objects placed on the scene, the JSX code of your scenegraph becomes merely a long list which might be as hard to understand as the original Three.js representation of the scenegraph.
However, with React you can split up such a long list in a breeze, for example by categorizing the 3D objects:
<Scene3D>
  <models type={"characters"} />
  <models type={"buildings"} />
  <models type={"trees"} />
</Scene3D>
Sometimes using React requires some extra steps, for instance when loading 3D models, and sometimes it might take a bit time to find the right way of implementing common Three.js functionality like for instance user controls or calling Three.js' own render method manually.
To elaborate on the latter example: by default both react-three and react-three-renderer call Three.js' render function continuously by passing it to Window.requestAnimationFrame(). While this is a good choice for 3D games and animations, it is might be overkill in applications that have a more static scene like applications that simply show 3D models, or our Minecraft character configurator. In both libraries it is possible to turn off automatic rendering by setting a parameter on the scenegraph component, as you can see in the code of the Minecraft character configurator.
Conclusion
For the types of project that I have discussed above I would definitely recommend using React bindings for Three.js. Not only your code will be better set up and thus better maintainable, it will also speed up your work significantly once you have acquainted yourself with the workflow of React as well.
Whether you should use react-three or react-three-renderer depends on your project. Both libraries are relatively new but as you can see on Github the code gets updated on a weekly basis, and moreover there are lively discussions going on in the issue trackers and issues and suggestions are quite swiftly picked up.
Some final remarks that can help you make up your mind:
- react-three depends on Three.js r72 React version 0.14.2, react-three-renderer works with the most recent versions of both Three.js and React.
- react-three-renderer has not yet implemented all Three.js features, react-three does (mainly because its lesser granularity).
- in react-three the ray caster doesn't work i.c.w. controls like the OrbitControls, in react-three-renderer it does.
- both libraries provide excellent examples, studying these will give you a good grasp of the basic principles.
Don't hesitate to get in touch with us, if you have any questions or remarks about this post. Feedback is much appreciated.